Travailler avec des carrousels dans les conversations des robots
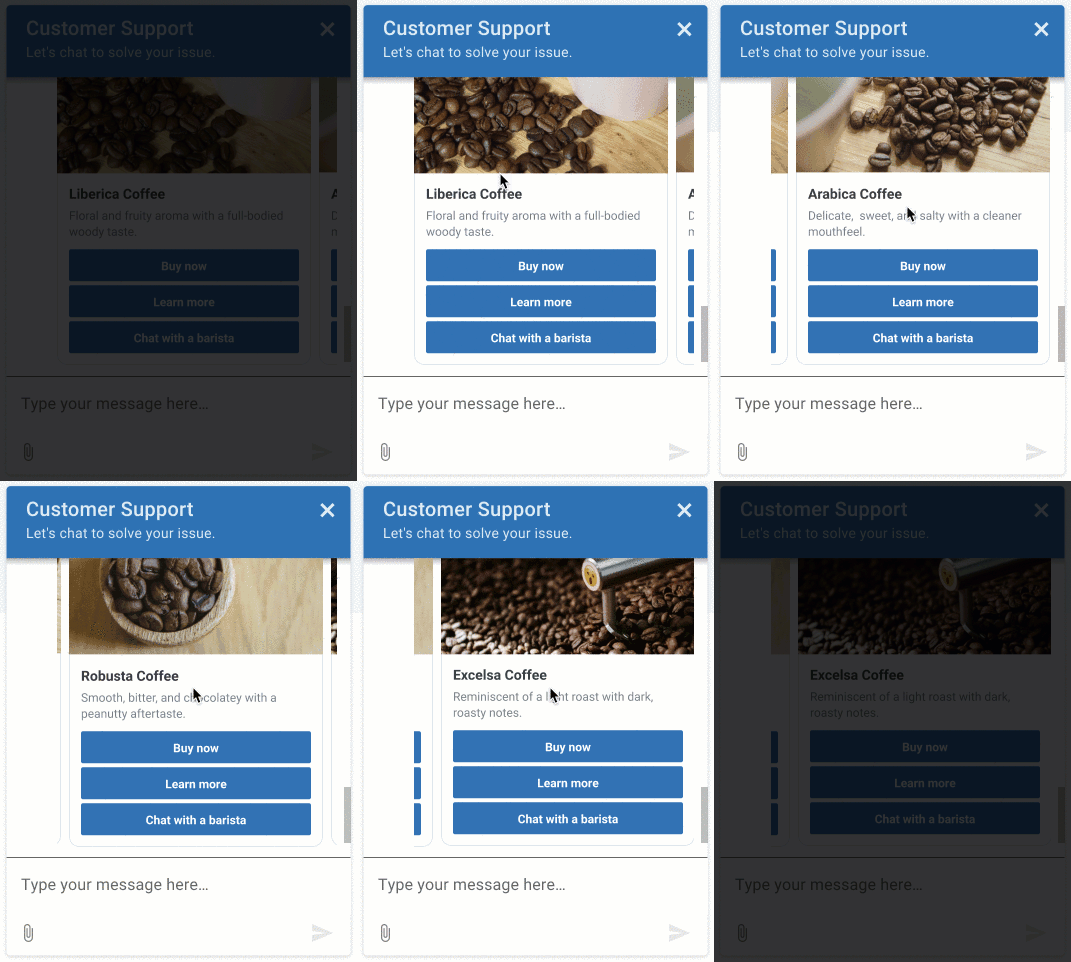
Les carrousels sont des réponses bot qui comprennent une série de cartes. Pour interagir avec les carrousels, les clients peuvent faire défiler les options des cartes, puis sélectionner une option en utilisant les boutons associés aux cartes.
Les carrousels facilitent les conversations des robots en proposant des options et des actions avancées dans le cadre d'une expérience automatisée. Les carrousels offrent un ensemble sophistiqué d'options aux clients en présentant une série de cartes avec des descriptions, des images, des titres, des textes et des références facultatives à des sites web externes. Pour plus d'informations sur les cartes, voir Travailler avec des cartes dans les conversations de robots.
Exemple: Carrousels dans Genesys Web Messenger

Soutien aux robots et aux canaux
Bots actuellement pris en charge :
- Les flux de Genesys Digital Bot
- Google Dialogflow
- Google Dialogflow Chat
- Connecteur Digital Bot
- Connecteur de bot
Bots actuellement pris en charge :
- Messagerie web Genesys
- Facebook Messenger
- WhatsApp Messenger
- Note: Avant de pouvoir utiliser cette fonction dans Open Messaging, vous devez d'abord créer un profil de configuration et sélectionner le type de message Carousels approprié. Ensuite, assignez-le à votre intégration de messagerie ouverte. Pour plus d'informations, voir Créer et affecter un profil de configuration.Messagerie ouverte
Limites de la mise en œuvre du carrousel
Lorsque vous concevez et mettez en œuvre des structures de carrousel dans vos réponses aux robots, tenez compte de ces limites :
- Vous pouvez mettre en œuvre jusqu'à 10 cartes dans un seul carrousel.
- La charge utile que vous configurez sur les boutons de la structure de la carte doit être unique pour toutes les cartes du carrousel.
- Twitter et WhatsApp ne prennent pas en charge les structures carrousel.
- Amazon Lex V1 limite le JSON personnalisé à 1000 caractères. Si vous devez utiliser plus de 1000 caractères pour créer votre carrousel, cette limitation peut avoir un impact sur la mise en œuvre.
- Les actions par défaut ne sont pas prises en charge pour WhatsApp, LINE ou Twitter. Si vous configurez des actions par défaut dans ces applications, celles-ci les ignorent.
Google Dialogflow ES uniquement :
Ces sections décrivent comment intégrer des carrousels dans votre robot Google Dialogflow ES ou CX, et incluent des exemples de cas d'utilisation et d'autres ressources.
- Installer l’intégration Google Dialogflow à partir de Genesys AppFoundry
- Configurer les informations d’identification du compte de service de la plateforme Google Dialogflow
- Activer l’intégration de Google Dialogflow
- Pour configurer des carrousels dans la console Dialogflow, utilisez ce JSON personnalisé pour définir les options de carte pour l'intention de votre robot. Utilisez plusieurs structures de cartes pour créer un carrousel.
{
   "genesys_prompt": "String", // optional message text
   "genesys_carousel": [
        {
             "title": "String", // mandatory text to show in the title
             "description": "String", // optional text to show in the description
             "image": "URL", // optional URL of an image
             "defaultAction":  { // optional default button action
                   "type": "String", // Describes the type of action. Valid values Link Postback
                   "text": "String", // The response text from the button click
                   "payload": "String", // Text to be returned as the payload from a ButtonResponse when a button is clicked. The payload and text are a combination which will have to be unique across each card and carousel in order to determine which button was clicked in that card or carousel.
                   "url": "String" // A URL of a web page to direct the user to.
             },
             "actions": [
                   {
                        "type": "String", // Describes the type of action.  Valid values Link Postback
                        "text": "String", // The response text from the button click
                        "payload": "String" // Text to be returned as the payload from a ButtonResponse when a button is clicked. The payload and text are a combination which will have to be unique across each card and carousel in order to determine which button was clicked in that card or carousel.
                   },
                   {
                        "type": "String", // Describes the type of action.  Valid values Link Postback
                        "text": "String", // The response text from the button click
                        "url": "String" // A URL of a web page to direct the user to.
                   }
             ]
        }
   ]
}
Pour utiliser les options du carrousel afin de remplir l'emplacement de votre robot, utilisez le JSON personnalisé de la section précédente dans un webhook. Utilisez plusieurs structures de cartes pour créer un carrousel. Vous pouvez également utiliser un AWS Lambda à cette fin. Pour plus d'informations, voir Webhook for slot filling dans le guide Google Cloud Dialogflow ES.
Apprendre encore plus :
- À propos de l’intégration de Google Dialogflow
- Webhook pour le remplissage de fentes dans le guide Google Cloud Dialogflow ES
Connecteur Digital Bot
Ces sections décrivent comment incorporer des carrousels dans votre bot Genesys Digital Bot Connector et incluent d'autres ressources.
- Créer un bot qui respecte les spécifications de Genesys Digital Bot Connector.
- Configurer l'intégration de Genesys Digital Bot Connector.
- Utilisez le format normalisé Genesys pour définir les carrousels.
    {
      "type": "Structured",
      "content": [
        {
          "contentType": "Carousel",
          "carousel": {
            "cards": [
              {
                "title": "50% off Flights to Norway",
                "description": "Valid September to November only",
                "image": "https://www.samplesite.com/photo/1234.jpg",
                "defaultAction": {
                  "type": "Link",
                  "url": "http://www.samplesite.com/flights/norway"
                },
                "actions": [
                  {
                    "type": "Link",
                    "text": "View Details",
                    "url": "http://www.samplesite.com/flights/norway"
                  },
                  {
                    "type": "Postback",
                    "text": "Book Now",
                    "payload": "I want it"
                  }
                ]
              },
              {
                "title": "35% off Flights to Finland",
                "description": "Valid February to March only",
                "image": "https://www.samplesite.com/photo/5678.jpg",
                "defaultAction": {
                  "type": "Link",
                  "url": "http://www.samplesite.com/flights/finland"
                },
                "actions": [
                  {
                    "type": "Link",
                    "text": "View Details",
                    "url": "http://www.samplesite.com/flights/finland"
                  },
                  {
                    "type": "Postback",
                    "text": "Book Now",
                    "payload": "I want it"
                  }
                ]
              }
            ]
          }
        }
      ]
    }
Connecteur de bot
Ces sections décrivent comment incorporer des réponses rapides dans votre bot Genesys Bot Connector et incluent d'autres ressources.
Apprendre encore plus :


